Friday, June 28

Baby Changes


 The phrase "they grow up so fast" is one we hear more often than we'd like sometimes.  I remember holding my tiny little girl, fast asleep in my arms and hearing people tell me to cherish the moment, soak it up, before too long she'll be going off to college.  Ugh, it drove me batty.  I was a brand new mommy, of course I was soaking her up!!!  Well, guess what?  Now I'm the one saying it!  {slaps forehead}

Callie is now 13 months old and we cannot get over how quickly the months have passed.  I've said it before and I'll for sure say it again, but this goes by so quickly.  It's one of the reasons I am so happy we started this blog nearly 4 years ago.  On sleepless nights I can pull up the archives and read about all of the amazing moments from our lives, sometimes reliving something I had completely forgotten.  This next part is totally just for said record keeping's sake... For most of you this is the part you can just skip over :).

Our "Little Bird" {as we so affectionately call her thanks to this picture in the NICU} is pushing 19 pounds (finally) and walking like nobody's business!  Some of her favorite words are; Daddy, Momma, bye-bye, hi, puppy, moah (more), uhsis (what's this?), kickle kickle {in a high squeaky voice} (tickle-tickle), and open (she LOVES those plastic Easter eggs and every time she opens them we say "open"). 

She eats like a total champ, too!  Every morning she has her fresh oatmeal with purred banana/blueberries (and vitamins) along with a cup of milk. Lunch time usually consists of some type of lunch meat, fruit (usually grapes), cheese and crackers/bread and juice.  She gets a snack in the afternoon, yogurt or applesauce and dinner is whatever we are eating that night.  I stopped nursing just after she turned 13 months -that is a whole different blog post though - and we said goodbye to bottles at the same time. 

I'm pretty blessed to have such a good little girl on my hands.  She sleeps 10-12 hours a night, takes two naps a day (each at least 1-2 hours long) and plays SO well by herself.  There are moments, more so lately, that she wants to follow me around or just sit in my lap and I do my best to stop whatever it is I am doing and focus on her.  As I previously stated, it goes by so fast, and I don't want to miss an opportunity to let every part of her soak into my memory storage. 

From time to time, as part of my attempt to track her growth, I'll revisit old pictures of her and try to recreate them for comparison's sake.  It's REALLY cool to look back and see her changes and I urge all of you (who are in the same situation, or soon to be) to do this!  You will be so glad you did.


Wednesday, June 26

Recovering from a Downward Plunge on the Suicide Roller Coaster.


Losing a parent is terrible.  Losing a parent at a young age is even worse.  Losing a parent to suicide is utterly impossible.

It’s been two and a half years since I lost my dad and the roller coaster of emotions has not subsided.   I was dusting my nightstand the other day and in the process cleaned the memorial my mom had made after his death.  In the middle of cleaning I lost my breath and fell to my knees as tears streamed from my eyes.  The ache of missing him just doesn’t get any better.  

What’s really terrible is that I haven’t been to the mausoleum since last year.  There is something very heavy about going there.  It’s a beautiful place, really… But I cannot express to you how difficult it is to look up at a wall of tiny glass cubbies filled with ornate vases that are filled with burnt up bodies.  I’m terribly sorry if that is too morbid for you, but that is exactly what I think every time I go.  I see my dad’s urn way up high and think that complete strangers in this cold, strange place surround him… I guess there really is no happy place for someone’s body to lay to rest, but for some reason it’s just overwhelming to go.  

Now, I am a Christian and I firmly believe in heaven and hell, so I know that my dad’s soul is not in that tiny little box on the wall.  But there brings the debate that no one dares to utter out loud.  Heaven or hell?  My dad was the driving force behind my faith.  He taught me to love as Christ loves me, to forgive even when the person doesn’t deserve forgiveness, to give until there is nothing left to give and then give a little more, and to follow Christ with complete and total trust.  My dad was an amazing man of God.   His last words in his letter were, “God forgive me…”  That keeps me up at night.   I pray that He did.  The difficult part is that I don’t know.   I won’t get to have this question answered until I am called Home.  Will my daddy be standing behind those gates eagerly awaiting my arrival with open arms and tears running down his face?  Gosh, I hope so.  But the thought of him being nowhere in sight crushes my soul.  It’s a thought I battle daily. 

Callie is now walking, talking and becoming her own little person.  She makes me so proud.  So fulfilled.  Yet, every time I see her I think of him; how he always talked about getting his girl… Ugh.  He missed it by a year!!!   She doesn’t know any better, and her “Big Daddy” is an incredible grandfather… What she is missing from my dad she truly does get from him, but I still hurt for her.  No one should have to grow up without their grandpa.  Without ever even getting the chance to be held by him or hear him utter “I love you.” 

I play that day in my head over and over and over… It haunts me.  I’ve never written about it because I don’t want to bring that many people into pure devastation and pain.  Sometimes I wonder, if I wrote it all down, would it finally leave me alone?  Probably not.  And I’m too scared to relive it all just for the memory to grow stronger.  Yet another question that remains to be answered.  

Please don’t get me wrong; I am SO happy and content in my life.  Josh and Callie bring me a happiness that cannot be explained.  I adore my family and friends and have truly been blessed with a wonderful life.   But all of that doesn’t cancel out the pain that festers in my heart from losing my dad.  Unfortunately, this roller coaster is just recovering from a downward plunge {hence the melancholy tone of this post}, but the good news is that with every plunge comes the climb back to the top…. I’m just holding on for dear life hoping that the next drop isn’t as fast and deep as the last.

Monday, June 24

Fourth Of July Headbands!

I'm so excited to announce that my Etsy shop, Callie Marie Creations will be offering FREE SHIPPING on all Fourth of July headbands now through Wednesday!  Just take a moment to "like" us on Facebook and then send a message requesting the coupon code.  It's that easy!  Of course, Callie had to model our newest additions, maybe she should be getting a commission?  :)  Thanks for stopping by, and happy shopping! 

You can find all of these fancy little accessories on my Etsy shop here!  


Saturday, June 22

Chalkboard Monthly Updates Book


Create your own custom photo books at Shutterfly.com.

A lot of you have asked where we made our chalkboard photo book for Callie's monthly updates.  Here is the actual book I made on Shutterfly.  There is a custom route option, then I just played around with different fonts and backgrounds.  We love how it turned out so much!  Let me know if you have any other questions, I'd be happy to help! :)

Thursday, June 20

Fourth of July Cuteness

So the Fourth of July is quickly approaching and all of my crafty cells are starting to buzz with excitement.  Not to mention my gurgling tummy... hot dogs, hamburgers, Rocketpops!!!  Seriously, who doesn't love this holiday?! 

I've had some requests for custom headbands and it got me thinking, I haven't even figured out what to do for Callie or myself yet!  So, this afternoon during nap time I unloaded my newly organized crafting materials {Still have a long way to go as far as organization is concerned...} and started coming up with some ideas.

I'm waiting on an order of thick red elastic which will look absolutely adorable on this little number...


And then there's this one, which has already sold {WOO!}


Then, I decided to try my hand at a knot headband.  It just so happens that I had an old red t-shirt (red is just not my color) lying around in the closet so I up-cycled it for this sweet little number that I loved so much, I made myself one to match!!


Yep, Callie and I will have matching headbands for the Fourth!  It could be worse... I have been known to steal her headbands and use them for myself. :) 


We still don't have solid plans laid down for that weekend, but we are ecstatic that Josh's incredible boss gave them Friday off, too! Can I get a woo-hoo for a 4 day weekend with my man???  I can already smell the sunscreen and burgers.  Get excited.  :)

Tuesday, June 18

5 Questions to a Better Marriage


Back in February I came across this great article that listed 10 things that made all the difference in a couple's marriage and was intrigued.  I searched a little deeper and came across these 5 questions.  Basically, every Sunday night you get together with your spouse and ask the same five questions to one another.  I mentioned the idea to Josh and he was on board for giving it a shot, too. 

I cannot tell you how much this has helped our marriage.  Not only has it strengthened our relationship, but it has opened up doors that we didn't realize were closed.  It has brought us closer to the Lord and to one another.  By far, this has been one of the best things that Josh and I do as a married couple.   I have recommended this to some of our closest friends, but today I want to urge you to give it a shot with your spouse as well!  I promise you, it will be WELL worth it. 

Okay, here are the five questions!!  Remember, the husband AND the wife have to ask each other all 5 questions.  Josh and I just take turns asking and answering each one...

1. How did I make you feel loved this week?

This question has become one of my favorites.  Josh tells me something I did to make him feel loved and sometimes the thing he chooses is not what I was expecting!  Once he told me that getting text messages throughout the day made him feel loved, well that is an easy one, and I had NO idea how much it meant to him until he told me!  I have to say, I now find myself going out of my way to try and make him feel loved.  I never realized that it was something I hadn't really done before. 

It has also helped him realize what speaks to my heart!  For example, I HATE when Josh has to go out of town... HATE IT.  But, I married a hunter and with that comes weekends alone.  One particular weekend (after we had started this little tradition) he headed out of town.  I went into our bathroom to change from work and on the bathtub was my kindle, a bottle of wine and a note... He had downloaded a brand new book for me to read, and the note held directions for what I was to do.  It completely melted my heart.  Later that night, while brushing my teeth I found another note tucked away, then getting into bed, another one under my pillow.  I thought he had completely outdone himself.  The next day I found two more notes, one in the spoons, "I wish we were together so we could spoon" (TOTALLY cheesy, but I loved it) and then later another one in the microwave.  It didn't take him long to do, cost nothing and made me think of him the entire weekend.  That is one of my favorite memories of our marriage so far and I don't think it would have happened without this question being asked. 


Another prime example of something that made me feel EXTREMELY loved...


2. What does your week look like?

This seems like such a simple question, one that most couples probably ask already.  But to me, it has blossomed into a spiritual question that has helped me pray for my husband.  More on that later though.

3. How can I make you feel loved or encouraged in the days ahead?

I adore this question for many reasons.   I am a woman, and with that my mind, heart and feelings change by the minute.  What made me feel loved last week might not make me feel loved this week.  By asking this question he gets an insight to how I am feeling and what I will need based on what my upcoming week looks like and helps him to prepare in advance.  It's wonderful!

4. How would you like to be pursued in sex/intimacy this week?

I thought this question would be SO awkward to ask.  And, at first it was a little bit.  But as we grew closer together this question became easier to answer honestly and openly.  Having an intimate, physical relationship with your spouse is incredibly important.  Not everyone likes the same things and this question helps eliminate those uncomfortable or disappointing moments.  Sometimes it's as simple as "please give me back rubs," or "let's listen to music together."  Other times the answer is a little more direct; those ones are my favorite because it opens up lines of communication that might otherwise be closed.  Men and women are so, very different... This question is incredible for giving ideas that one or the other wouldn't have generated on their own.  I must say, number 4 has really enhanced our love life in ways I didn't think were possible! 


5. How can I pray for you this week?

If you are only going to do one of these questions, I urge you that it be this one.  Can you believe that before we started this process, I didn't pray for my husband regularly?  It's so embarrassing to admit, even shameful.  As a Christian woman, it is my job, my responsibility to be in prayer for those around me.  Not just when I laid my head down at night and rambled off a list of things to God as I drifted off to sleep... But to be in constant prayer, for specific things.  God tells us in Matthew 7:7-12;

“Ask and it will be given to you; seek and you will find; knock and the door will be opened to you. For everyone who asks receives; the one who seeks finds; and to the one who knocks, the door will be opened. 
“Which of you, if your son asks for bread, will give him a stone? Or if he asks for a fish, will give him a snake? If you, then, though you are evil, know how to give good gifts to your children, how much more will your Father in heaven give good gifts to those who ask him! So in everything, do to others what you would have them do to you, for this sums up the Law and the Prophets.

This is where question two comes into play.   If Josh has a day that is going to be particularly long or stressful, he tells me exactly what it is that I can lift up in prayer.  I have found that not only does praying for my husband bring me closer to him, it also brings me closer to the Lord.  I want to encourage you today not only to ask your spouse this question, but also your friends, your family and even your coworkers.  The power of prayer is incredible... 

And that's it!  It usually takes about ten minutes, tops... Everyone has ten minutes to spare!  I promise you, it will be the best ten minutes you spend with your spouse that week (unless question #4 unlocks some really powerful stuff... in which case it might be the second best ten minutes you spend with your spouse ;) !)  Please give this a try, and not just once; make it a weekly tradition.  The more consistent you are, the more powerful it becomes.  And please, if you try this, let me know!  Encourage your friends and family as well and watch it transform relationships right in front of your eyes.  I DARE YOU...

Monday, June 17

Callie Marie Creations - Finally Open!

A while back I wrote a post contemplating opening a shop on Etsy to sell the sweet little headbands that I've been making for Callie.  Typically I'll get an idea and it will just sit and ferment in my brain juices until I come up with an excuse not to do it.  Well, no more excuses!  I've officially opened up shop, and I'm incredibly nervous excited about it.

Coming up with a name wasn't very difficult.  These headbands wouldn't be a reality if it weren't for the inspiration I get from my darling girl, so why not name it justly?  As is with most brand new shops, I only have a few listings of some of my absolute favorites, but I can also take custom orders and requests via email.  I'm currently working on two custom orders for the Fourth of July and am very excited about how they're turning out (Pictures will be coming soon)!

Here are some of the current listings, modeled by none other than Callie Marie herself. :)  I'll have some new items up soon that will be modeled by my sweet little niece and another close friend's precious babe and I can't wait!! 


This is a very scary journey for me.  Putting yourself out there isn't always easy and sometimes comes with a lot of heartache and disappointment.  My prayer has been that if this is in God's will, that He will take it and use it for His glory.  If you so desire, please spread the word about Callie Marie Creations to your loved ones and friends, any help is a HUGE help and I appreciate each one of you greatly!  Thank you for all of your support, encouragement and prayers.  We are truly blessed to have friends and family like you!

Please take a minute and check out our shop by clicking here!

Thursday, June 13

DIY Top Knot Jersey Knit Headband


Okay, I had another request for a DIY tutorial so I figured I’d give it a go.  A friend of mine sent me a picture of some adorable headbands she saw online and asked if I could show her how to make them.  It just so happens that I’ve been secretly lusting over these beautiful little creations myself, but haven’t been able to find a tutorial anywhere and I’m way too cheap frugal to buy pre-made ones. 

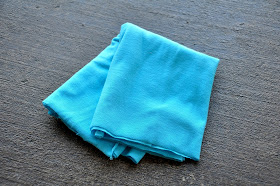
I took a little trip to Hobby Lobby (where Callie decided she’d say “hi” to every single person we passed… at least once) and picked up some jersey knit material.  They were a little on the pricey side so I just got ¼ of a yard per color.  I was kinda disappointed in their selection; they really didn’t have much to choose from. 

Anyway, I spent an afternoon trying to figure it out and finally had some success.  This is just the way that I did it, and by no means am I a professional, so if you can find a way to do it better, go for it!

What you’ll need:

·      Jersey Knit material (or an old t-shirt that you want to upcycle)
·      Sewing machine
·      Thread
·      Paper
·      Straight pins
·      Scissors

-->
Step 1:  You’ll want to cut the material.  I played with a lot of different lengths but found that (for my 12 month old) 22” X 5” worked the best. 

-->
Step 2: After your material is cut, fold it in half (like a hotdog).  Be careful because this material likes to roll up on itself. 


-->
Step 3: Take your piece of paper and using a round object from your house (I used one of Callie’s stacking cups) trace a semicircle onto the paper and cut it out.  This will be your guide for the ends of the fabric.  If you want a more pointed look, you can free hand that as well.  I like the rounded look for these headbands myself. 

-->
Step 4: Using your paper guide, cut out the shape on both ends of your fabric.

-->
Step 5: Pin your fabric in place.  This is totally optional; I skipped this part completely because I’m a little impatient…  Something I continually pray for. J 

Step 6: Sew the edges together.  I used a ¼ seam allowance but you can do whatever, just don’t get too close to the edge because this material tends to get sucked down into the sewing machine.  I also used a straight stitch instead of a zig-zag.   In the middle, skip over a little section of material (backstictch this or it will come apart when you turn it right-side-out).   If you skip this you won’t be able to turn the material right side out. 

-->
Step 7: Trim the edges

-->

Step 8: Turn the material right side out

Step 9: (Optional) You can hand stitch the little section that is left open if you so choose.  Because this material folds over onto itself, I just left the hole there; you really can’t see it when it’s on…


-->
Step 10: Tie a square knot with the ends. 


Now you’re finished!  I must say, I’m pretty pleased with the way these little beauties turned out.  They’re very stretchy and comfortable, Callie didn’t mind wearing it one bit.  Feel free to play around with the width, too.  The smaller the width the thinner the headband will be.  You can find my sailor knot headbands now on sale in my etsy shop

Happy crafting!!  


Tuesday, June 11

DIY Baby Leggings Tutorial


A lovely friend of ours is being blessed with her second pregnancy (praise the Lord for answered prayers!).  They have an incredibly adorable little boy already and, of course, were probably hoping for a little girl to dress up and love on.  Well, it turns out they are having another little boy... and a little girl!  That's right, twins.  We are absolutely overjoyed for this incredible, Godly family so when she asked me to help her out with some little girl DIY projects I didn't hesitate to say yes. 

This is a tutorial for how to make DIY baby leggins.  I promise you, this is SO easy, even a beginner could whip these things out in under 45 minutes.  Here's what you'll need:

  • Teen/Women's knee high socks (I found mine at Walmart, but they aren't always in stock.  If you know of a great online place please let me know in the comments section below.)
  • Scissors 
  • Sewing machine 
  • Thread
  • Straight pins


Seriously, that's all it takes!  Alright, hang with me as I attempt to break down the process.  :)

Step 1: Cut off the feet of both socks where the ankle would be.  Make sure that you do them exactly at the same point or you'll have one legging that is longer than the other.


Step 2: Cut out the middle section of the foot (mine were exactly 3 inches).  This is going to act as the hem at the base of the leggins.


Step 3: Fold the pieces you just cut out so that the insides are touching and both raw edges are together. The good side of the material should be showing.


Step 4:  Place the raw edges in line with the raw edge of the top of the sock.  This is where it gets kinda tricky.  Make sure that the upper portion of the sock is right side out and the small hem portion is also right side out.  I like to think of the hem portion as being a mouth that swallows up the tube of the upper portion... That probably just confused you more... If it did, sorry!


Step 5: Once the raw edges are all aligned (there should be 3 layers of material all along the edge of the sock opening) pin the material in place. I skipped this step once and never made that mistake again.  There are so many layers that it's difficult to make sure you're not leaving one out, if you do the leggins will have a gaping hole where the hem should be attached! 

Step 6: Sew!  I used a straight stitch.  Seriously it's so easy, just line the foot up with the edge of the fabric and sew around the entire opening once.  Make sure you're sewing around the edges and not through the entire sock from one side to the other or you'll end up with no opening.


Step 7: Trim the excess material.  If you skip this step your leggins will have a bulky look to them at the bottom, and being the perfectionist that I am, that just can't happen! 


Step 8: Pull the hem down and wa-lah!!!  You have a legging.  Repeat steps 1-8 for the second sock for a complete pair. 


Now, if you're anything like me, a hoarder crafty person, you'll be looking at the left over scraps thinking, I can't throw these away!  Surely there is something I can make out of them... And if that is your thought process then you're not alone! I took the excess scraps and turned them into a headband to match.  I was a little weary of using sock fabric (ie. it might fray) but they turned out really cute, don't you think?? 


{Here are the directions for a matching rosette headband.}

Step 1: Cut the toe portion of the sock scraps around in a circle using the edge as a guide. 


Step 2. Tie a knot at the tip of the fabric.


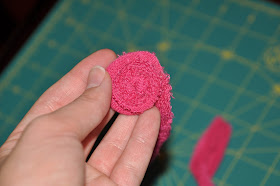
Step 3. Using the knot as a starting point, twist the fabric around and around the center.  You can use fabric glue to keep the material from slipping, but I'm impatient so, of course, I used hot glue!  (Warning, if you go the hot glue route, you will most certainly be playing hot potato with your fabric as the glue is, well, hot...)


Step 4: Keep going until all you have left is the last portion of material.  Take a little dab of glue to the bottom of the flower and secure the material over the entire base. 


Now you have a fabric flower!  Add some silk rosettes, beads and some elastic and there ya have it.  An absolutely adorable, waste-not, matchy-matchy headband!

I hope this wasn't too difficult to follow.  If you have any questions or comments please be sure to leave them below and I'll be sure to do my best to answer them. 


{Oh... And once you've finished, you'll of course have to do an impromptu photo sesh with your adorable 12 month old.  That might just be me though.  :) Happy crafting!!}